Managing File Sharing Service
Use the File Sharing pane to turn file sharing service on or off, and to control access
to the Groups, Public, and Users shared folders. You can also add or remove your own
shared folders, also known as share points.
Add or delete shared folders
Allow or deny access to the
shared folder
Give read and write access to all registered users
or only some users and groups, and allow or
deny read-only access to guests
About File Sharing Service
Mac OS X Server file sharing service lets users access shared folders and store files on
the server. They can use Macintosh, Windows, or UNIX computers to access their files
and shared folders without special software, using native file protocols such as AFP and
SMB. Windows users see Mac OS X Server file servers in their Network Places, just like
Windows file servers.

128
Chapter 9
Customizing Services
If you want to allow access to file sharing on the Internet and you have a cable router,
DSL router, or other network router, your router must have port forwarding (port
mapping) configured for file sharing. For more information, see “Protecting a Small
Network” on page 35.
If you want to allow access to file sharing outside your local network and your local
network has a separate firewall device, ask the firewall administrator to open the
firewall for the ports that file sharing uses. For a list of ports, see “Services and Ports” on
page 175.
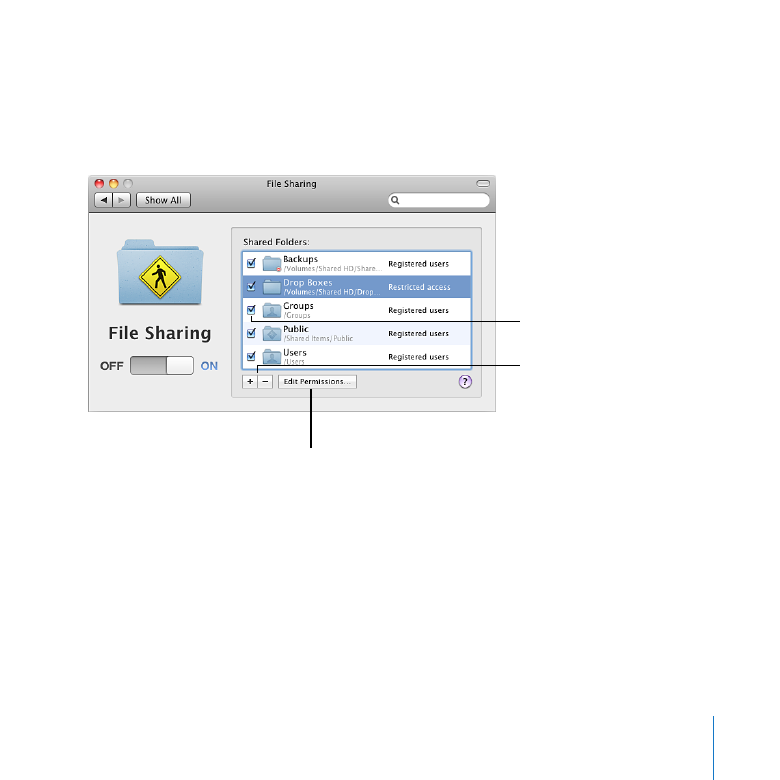
Controlling Access to a Shared Folder
You can enable or disable access to each shared folder listed in the File Sharing pane of
Server Preferences. You can specify which users and groups have read and write access
to each shared folder and its contents: all users with accounts on your server or only
users and groups you select. You can also choose whether to allow guest access for
each shared folder.
To change settings for a shared folder:
1
In the File Sharing pane of Server Preferences, locate the shared folder in the list.
2
To enable access to a shared folder, select its checkbox.
3
To give all users with accounts on your server read and write access to the shared
folder and its contents, click Edit Permissions and select “All registered users.”

129
Chapter 9
Customizing Services
4
To restrict read and write access to the shared folder and its contents, click Edit
Permissions, select “Only these registered users and groups,” and select the checkbox
next to each user and group you want to give read and write access to.
If you give a group read and write access, all users who are members have read and
write access even if their individual checkboxes are deselected.
5
To allow guest users to read the contents of a shared folder, click Edit Permissions and
select “Allow guests read-only access.” Deselect this option to disallow guest access.
Users who have permission to access a shared folder can use the AFP and SMB file
sharing protocols to access the folder.
Registered users and members of groups authenticate for read and write access by
using the name and password of their user account on the server. An external member
of a group has no account on the server, but can authenticate using the name and
password of the member’s external user account.
Guests don’t authenticate for read-only access to a shared folder. Unlike registered
users, guests don’t need user accounts on your server.
You can also change access permissions for a shared folder or any item in it by using
the Info window in the Finder. For information about setting permissions for folders
and files, switch to the Finder and then use the Help menu.
130
Chapter 9
Customizing Services