Importing Users
If your server is connected to your organization’s directory server, you can import users’
existing accounts
Your server gives each imported user account its own iChat address, personal calendar,
and My Page wiki portal. Imported user accounts can also have access to wikis, blogs,
web calendars, a server-based address book, the server’s shared files, and Time Machine
backup storage. If your server’s mail service and VPN service are turned on, imported
user accounts get email addresses and can use VPN to access the server remotely.
Availability of each service is subject to the service being turned on, and you can
individually control each imported user account’s access to services.

92
Chapter 6
Managing Users
To import a user account:
1
If you’re going to have the server send an invitation email to imported users, make sure
the custom introduction and the sender’s name and email address suit your needs.
For information, see “Customizing the Server Invitation Email” on page 101.
2
In the Users pane of Server Preferences, click the Add (+) button and choose “Import
User From Directory” from the pop-up menu.
If you don’t see a pop-up menu when you click Add (+), your server isn’t connected
to a directory server in your organization. See “Connecting Your Server to a Directory
Server” on page 71.
If your organization doesn’t have a directory server (apart from your server), you can
create new user accounts. For instructions, see “Adding a User Account” on page 89.
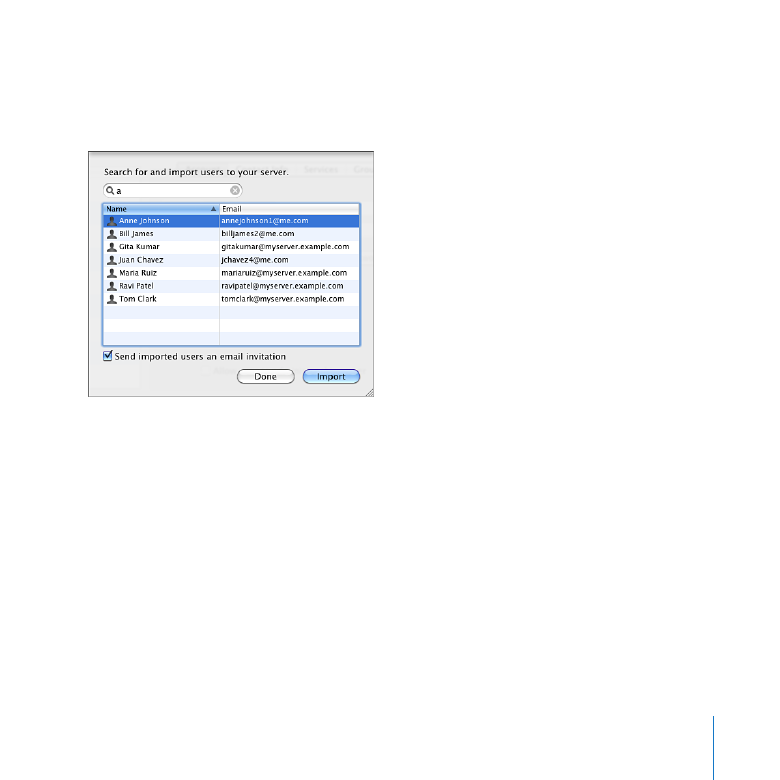
3
Type part or all of the user’s name in the search field, and when you see the name
listed, select it, optionally select “Send imported users an email invitation,” and then
click Import.
4
When you’re finished importing user accounts, click Done.
User accounts you import using this procedure are shown as “Imported” in the
Users pane.
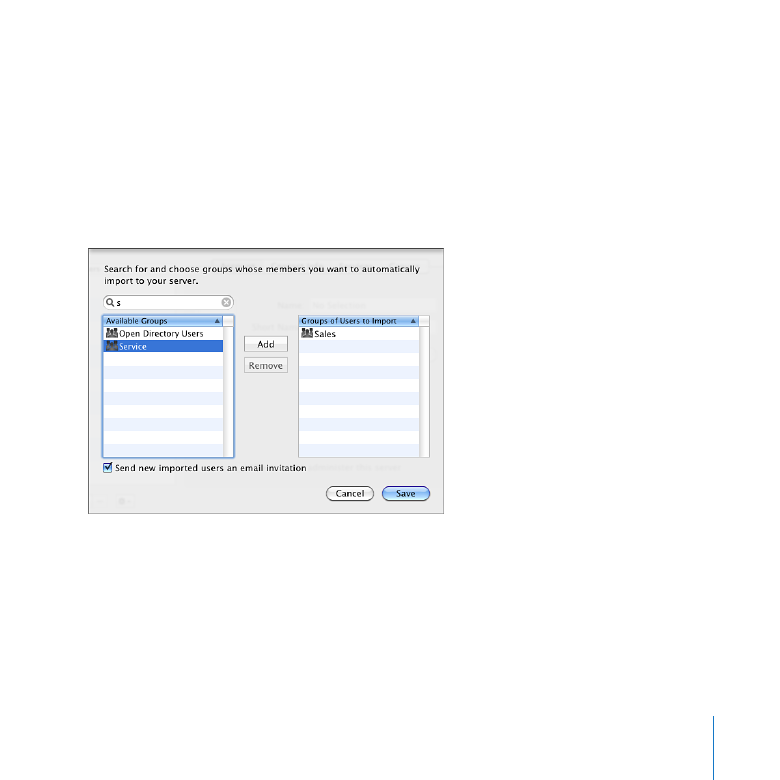
Instead of importing user accounts individually using this procedure, you can import
user accounts automatically from groups. For instructions, see the next section.
93
Chapter 6
Managing Users